前言
那段时间为了 GameJam 项目的开发,我到处学习一些Demo与教学,学到了很多我看一万种理论视频也学不来的知识,其中最令我收益匪浅的就是一个Up主的教程中,他对于UI系统的管理。
他没有麻烦地将需要的UI全部拖进场景中,而是使用了一个 UIManager 脚本去管理一堆 UIBase 的子类,并在需要的时候生成预制体。
我惊叹于竟然可以将对于UI的管理完全封装到一个类中,然后这个类只提供一个静态成员来存储这个类本身!这种方法既减免了很多对象被实例化的性能占用,更让UI的管理变得简单轻松——你只需要在任何需要的地方调用这个静态成员,就能使用 UIMnager 中的所有方法。
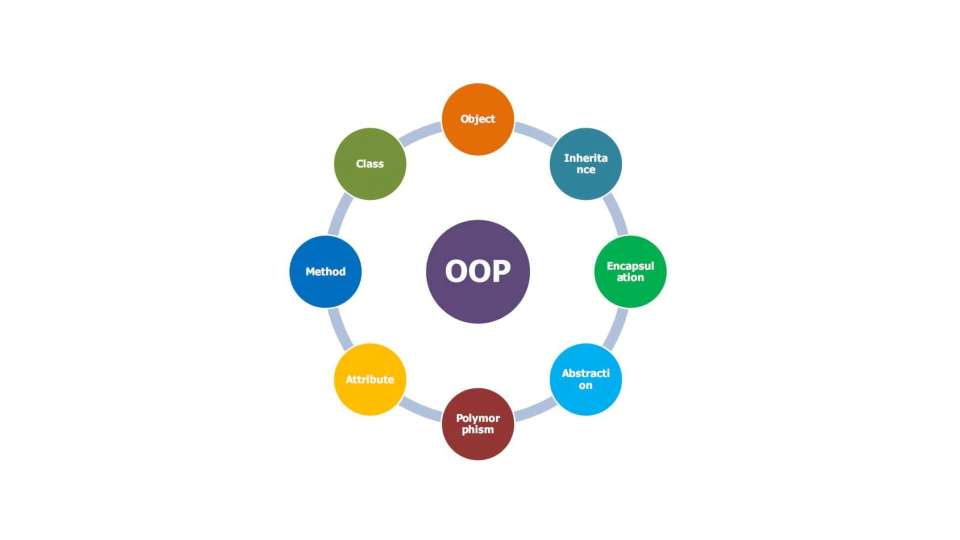
了解过之后才知道,这种巧妙的方法有很多,它们是面向对象的设计模式,而我了解到的这种叫做单例模式。
单例模式
设计模式概述
什么是设计模式
设计模式(Design Pattern) 是软件设计中针对常见问题的可重用解决方案。它们不是可以直接转化为代码的完整设计,而是解决特定问题的模板或指导方针,是众多软件工程师经过长期实践总结出来的最佳实践方案。
设计模式的分类
设计模式通常分为三大类:
创建型模式(5种)
- 单例模式(Singleton)
- 工厂方法模式(Factory Method)
- 抽象工厂模式(Abstract Factory)
- 建造者模式(Builder)
- 原型模式(Prototype)
结构型模式(7种)
- 适配器模式(Adapter)
- 装饰器模式(Decorator)
- 代理模式(Proxy)
- 外观模式(Facade)
- 桥接模式(Bridge)
- 组合模式(Composite)
- 享元模式(Flyweight)
行为型模式(11种)
- 策略模式(Strategy)
- 模板方法模式(Template Method)
- 观察者模式(Observer)
- 迭代器模式(Iterator)
- 责任链模式(Chain of Responsibility)
- 命令模式(Command)
- 备忘录模式(Memento)
- 状态模式(State)
- 访问者模式(Visitor)
- 中介者模式(Mediator)
- 解释器模式(Interpreter)
设计模式的六大原则
- 开闭原则:对扩展开放,对修改关闭
- 单一职责原则:一个类只负责一个功能领域
- 里氏替换原则:子类必须能够替换其父类
- 依赖倒置原则:依赖于抽象而非具体实现
- 接口隔离原则:使用多个专用接口而非一个总接口
- 迪米特法则:最少知识原则,降低耦合度
设计模式的意义
设计模式的核心目的是提高软件的可维护性、可扩展性和复用性,同时保证代码的灵活性和可靠性。
简单来说,设计模式的目标可以从以下几个维度理解:
- 解决常见设计问题,避免重复造轮子
- 提升代码的可维护性
- 增强可扩展性
- 促进团队协作
- 优化性能与资源管理
- 平衡灵活性与复杂度
- 传承最佳实践
单例模式
什么是单例模式
单例模式确保一个类只有一个实例,并提供一个全局访问点。这种模式属于创建型模式,它提供了一种创建对象的最佳方式。
适用场景
- 当类只能有一个实例且客户可以从一个众所周知的访问点访问它时
- 当这个唯一实例应该是通过子类化可扩展的,并且客户应该无需更改代码就能使用一个扩展的实例时
- 需要严格控制全局变量的场景
- 频繁创建和销毁的对象
- 重量级对象,需要共享的资源(如数据库连接池、线程池、配置对象等)
实现方式
饿汉式(线程安全)
1
2
3
4
5
6
7
8
9
10
11
12
| public sealed class Singleton
{
private static readonly Singleton instance = new Singleton();
private Singleton() {}
public static Singleton Instance
{
get { return instance; }
}
}
|
特点:
- 类加载时就初始化,浪费内存
- 没有加锁,执行效率高
- 线程安全
懒汉式(非线程安全)
1
2
3
4
5
6
7
8
9
10
11
12
13
14
15
16
| public sealed class Singleton
{
private static Singleton instance;
private Singleton() { }
public static Singleton GetInstance()
{
if (instance == null)
{
instance = new Singleton();
}
return instance;
}
}
|
特点:
懒汉式(线程安全)
1
2
3
4
5
6
7
8
9
10
11
12
13
14
15
16
17
18
19
20
| public sealed class Singleton
{
private static Singleton instance;
private static readonly object lockObj = new object();
private Singleton() { }
public static Singleton GetInstance()
{
lock (lockObj)
{
if (instance == null)
{
instance = new Singleton();
}
}
return instance;
}
}
|
特点:
双重检查锁(DCL)
1
2
3
4
5
6
7
8
9
10
11
12
13
14
15
16
17
18
19
20
21
22
23
24
25
26
| public sealed class Singleton
{
private static volatile Singleton instance;
private static readonly object lockObj = new object();
private Singleton() { }
public static Singleton Instance
{
get
{
if (instance == null)
{
lock (lockObj)
{
if (instance == null)
{
instance = new Singleton();
}
}
}
return instance;
}
}
}
|
特点:
- 懒加载
- 线程安全
- 效率较高(只有第一次创建时需要同步)
静态内部类
1
2
3
4
5
6
7
8
9
10
11
12
13
14
15
16
| public sealed class Singleton
{
private Singleton() { }
private static class SingletonHolder
{
internal static readonly Singleton Instance = new Singleton();
}
public static Singleton Instance
{
get { return SingletonHolder.Instance; }
}
}
|
特点:
- 懒加载(只有调用getInstance时才会加载SingletonHolder类)
- 线程安全
- 效率高
- 推荐使用
枚举
1
2
3
4
5
6
7
8
9
10
11
12
13
14
15
| public sealed class Singleton
{
static Singleton() { }
private Singleton() { }
public static Singleton Instance { get; } = new Singleton();
public void DoSomething()
{
}
}
|
特点:
单例模式的优缺点
优点:
- 提供了对唯一实例的受控访问
- 节约系统资源(避免频繁创建和销毁对象)
- 允许可变数目的实例(可以通过设计扩展)
缺点:
- 没有抽象层,难以扩展
- 职责过重,在一定程度上违背了”单一职责原则”
- 不适用于变化的对象
- 滥用单例会导致代码耦合度高,难以测试
单例模式的注意事项
- 线程安全:多线程环境下要确保只创建一个实例
- 序列化问题:如果单例类使用了Serializable特性,反序列化时会创建新实例
- 反射攻击:通过反射可以调用私有构造器创建新实例
- 类加载器问题:不同的类加载器可能会创建多个实例
- 内存泄漏:长时间不用的单例对象可能导致内存泄漏
设计模式与单例模式的实践建议
- 不要过度使用单例模式:单例模式本质上是全局变量,过度使用会导致代码难以维护和测试
- 考虑依赖注入:对于需要单例的对象,可以考虑使用依赖注入框架(如Spring)来管理
- 优先选择枚举实现:枚举实现简单且能防止反射和序列化问题
- 注意生命周期管理:明确单例对象的创建和销毁时机
- 考虑替代方案:对于某些场景,静态工具类可能是更好的选择
Unity UI的管理
在我的项目中,我融汇并使用了这种设计模式。尽管可能并不是很完美与规范,但还是为我的开发带来了不少的便捷与优化。
UI的构建
UIBase: UI基类
1
2
3
4
5
6
7
8
9
10
11
12
13
14
15
16
17
18
19
20
21
22
23
24
25
26
27
28
29
30
31
32
33
34
35
| using System;
using System.Collections;
using System.Collections.Generic;
using UnityEngine;
public class UIBase : MonoBehaviour
{
public UIEventTrigger Register(string name)
{
Transform tf = transform.Find(name);
return UIEventTrigger.Get(tf.gameObject);
}
public virtual void Show()
{
gameObject.SetActive(true);
}
public virtual void Hide()
{
gameObject.SetActive(false);
}
public virtual void Close()
{
UIManager.Instance.CloseUI(gameObject.name);
}
}
|
UIEventTrigger: UI事件类
1
2
3
4
5
6
7
8
9
10
11
12
13
14
15
16
17
18
19
20
21
22
23
24
25
26
27
28
29
30
31
32
33
34
35
36
37
38
39
40
41
| using System.Collections;
using System.Collections.Generic;
using UnityEngine;
using UnityEngine.EventSystems;
using System;
public class UIEventTrigger : MonoBehaviour, IPointerClickHandler, IPointerEnterHandler, IPointerExitHandler
{
public Action<GameObject, PointerEventData> onClick;
public Action<GameObject, PointerEventData> onEnter;
public Action<GameObject, PointerEventData> onExit;
public static UIEventTrigger Get(GameObject obj)
{
UIEventTrigger trigger = obj.GetComponent<UIEventTrigger>();
if (trigger == null)
{
trigger = obj.AddComponent<UIEventTrigger>();
}
return trigger;
}
public void OnPointerClick(PointerEventData eventData)
{
onClick?.Invoke(gameObject, eventData);
}
public void OnPointerEnter(PointerEventData eventData)
{
onEnter?.Invoke(gameObject, eventData);
}
public void OnPointerExit(PointerEventData eventData)
{
onExit?.Invoke(gameObject, eventData);
}
}
|
在 UIBase 中,我封装了包括打开关闭与UI事件的基本逻辑。然后将UI事件扩展成一个类,在改类中使用 Action 事件来存储UI被触发时的逻辑,并实现了需要的鼠标事件接口,在对应的鼠标事件函数中调用对应的UI事件,扩展了UI的事件多样性。
UI的管理
UIManager: 管理UI的单例类
1
2
3
4
5
6
7
8
9
10
11
12
13
14
15
16
17
18
19
20
21
22
23
24
25
26
27
28
29
30
31
32
33
34
35
36
37
38
39
40
41
42
43
44
45
46
47
48
49
50
51
52
53
54
55
56
57
58
59
60
61
62
63
64
65
66
67
68
69
70
71
72
73
74
75
76
77
78
79
80
81
82
83
84
85
86
87
88
89
90
91
92
93
94
95
96
97
98
99
100
101
102
103
104
105
106
107
108
109
110
111
| using System.Collections;
using System.Collections.Generic;
using UnityEngine;
using UnityEngine.UI;
public class UIManager : MonoBehaviour
{
public static UIManager Instance;
private Transform canvasTf;
private List<UIBase> uiList;
private UIManager() { }
public static void Init()
{
Instance = this();
canvasTf = GameObject.Find("Canvas").transform;
uiList = new List<UIBase>();
}
public UIBase ShowUI<T>(string uiName) where T : UIBase
{
UIBase ui = Find(uiName);
if (ui == null)
{
GameObject obj = Instantiate(Resources.Load("UI/" + uiName), canvasTf) as GameObject;
obj.name = uiName;
ui = obj.AddComponent<T>();
uiList.Add(ui);
}
else
{
ui.Show();
}
return ui;
}
public void HideUI(string uiName)
{
UIBase ui = Find(uiName);
if (ui != null)
{
ui.Hide();
}
}
public void CloseAllUI()
{
for (int i = uiList.Count - 1; i >= 0; --i)
{
Destroy(uiList[i].gameObject);
}
uiList.Clear();
}
public void CloseUI(string uiName)
{
UIBase ui = Find(uiName);
if (ui != null)
{
uiList.Remove(ui);
Destroy(ui.gameObject);
}
}
public UIBase Find(string uiName)
{
foreach (var t in uiList)
{
if (t.name == uiName)
return t;
}
return null;
}
public T GetUI<T>(string uiName) where T : UIBase
{
UIBase ui = Find(uiName);
if (ui != null)
{
return ui.GetComponent<T>();
}
return null;
}
}
|
在UIManager中,我提供了一个公共的 Instance 属性作为“窗口”,使得所有脚本都可以调用 UIManager 的方法,然后关闭构造函数,提供一个静态的初始化函数,使Instance只能通过初始化函数实例化自身。最后再加上对UI进行管理的相关方法,一个专业的管理者就诞生了。
UI的实例
再之后,分别写出需要的UI实例类,继承UIBase,使它们获得UI的基本逻辑,如:
LoginUI: 登录界面
1
2
3
4
5
6
7
8
9
10
11
12
13
14
15
16
17
18
19
20
21
22
23
24
25
26
27
28
29
30
31
32
33
34
35
36
37
38
39
40
41
42
43
44
| using System;
using UnityEngine;
using UnityEngine.EventSystems;
public class LoginUI : UIBase
{
private void Awake()
{
Register("start").onClick = onStartGameBtn;
Register("settings").onClick = onSettingsBtn;
Register("quit").onClick = onQuitBtn;
}
private void onStartGameBtn(GameObject @object, PointerEventData data)
{
UIManager.Instance.ShowUI<GameUI>("GameUI");
Close();
}
private void onSettingsBtn(GameObject @object, PointerEventData data)
{
UIManager.Instance.ShowUI<SettingsUI>("SettingsUI");
}
private void onQuitBtn(GameObject @object, PointerEventData data)
{
#if UNITY_EDITOR
UnityEditor.EditorApplication.isPlaying = false;
#else
Application.Quit();
#endif
}
}
|
SettingsUI: 设置界面
1
2
3
4
5
6
7
8
9
10
11
12
13
14
15
16
17
18
19
20
21
22
23
24
25
26
27
28
29
30
31
32
| using System;
using UnityEngine;
using UnityEngine.EventSystems;
public class SettingsUI : UIBase
{
private void Awake()
{
Register("close").onClick = onCloseBtn;
Register("backTOmenu").onClick = onBackBtn;
}
private void onCloseBtn(GameObject @object, PointerEventData data)
{
Close();
}
private void onBackBtn(GameObject @object, PointerEventData data)
{
Close();
UIManager.Instance.ShowUI<LoginUI>("LoginUI");
}
}
|
在具体的UI类中,需要根据UI的功能在最开始(Awake)的时候将对应的函数事件添加到相应的UI事件中。还记得吗?注册函数 Register 返回的是 UIEventTrigger 类。这时,我们在对UI进行操作时,便会调用对应的函数事件,执行UI的逻辑了。
同时,我们可以在例子中的具体UI事件中看到对于 UIManager 的调用,轻松的管理了UI界面的生成。
注意:UIManager 生成UI的方法是在资源文件中寻找相应名称的UI预制体,并将对应的脚本挂载到预制体上,所以,ShowUI< T >( "" ) 的两个参数一定不能写错。
尾声
单例模式是一种简单却强大的设计模式,它确保一个类只有一个实例,并提供了全局访问点。无论是管理配置信息、数据库连接,还是共享资源,单例模式都能帮助我们避免不必要的资源浪费,同时保证数据的一致性。
设计模式的世界远不止于此。除了单例模式,还有更多巧妙的设计模式,它们各自解决特定场景下的问题,让代码更具扩展性和可维护性。
设计模式的核心思想是“解决问题”,而非“套用规则”。希望本文能帮助你理解单例模式的精髓,并在实际开发中灵活运用。如果你对其他设计模式感兴趣,或者有更多想法与疑问,欢迎在评论区交流讨论!
—end—